Tag Archives: diy

5 Reasons Why This Former Dorm Dresser No Longer Has To Fear Dirty Socks

Or, 5 Reasons Why I’m One Step Closer to Organizational Nirvana

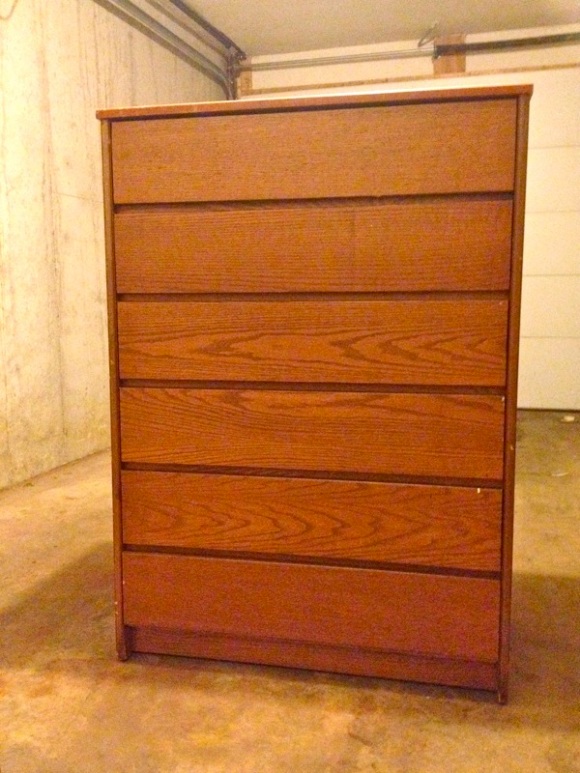
1. I rescued this dresser from the surplus store.

If you live near a big university, chances are their physical plant has a surplus or salvage store. If you’re lucky, the store will be open to the public, not just the university community, cause there are some good deals there, y’all. You’re not going to find anything super fancy (although my store does boast a few nice antiques and collectibles), but I’ve had an eye on dorm furniture for a while. That stuff is designed with storage in mind and built to outlast successive years of abuse.

dresser

Bless her heart. She just needed a little love.

With the new school year starting, a bunch of the older dressers got relegated to the scrap heap, as it were, but they were still in pretty good shape. This old girl caught my eye as I wandered past. I felt an immediate bond. She was all, “Omg I’ve been through dresser hell. You don’t even know. Do me a solid and get me out of here.” And I was like, “Right on, talking dresser.” $37 later, she was in my garage and ready for a makeover.
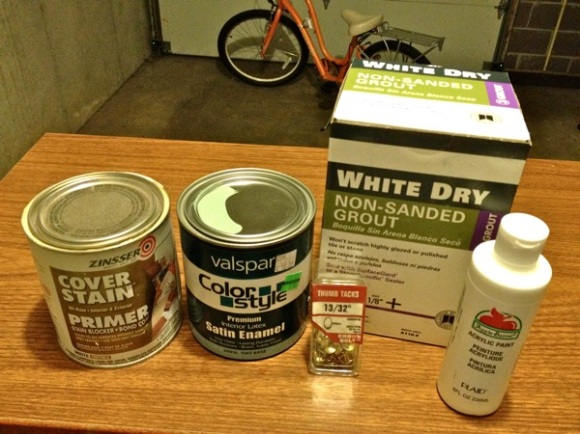
supplies

Here’s what I used for the job. Ignore the thumbtacks; they represent a short-lived idea that was scrapped as soon as I realized how dang hard it was to push thumb-tacks into that dresser. Seriously, built to last!

2. I primed her the lazy way.

Buy this stuff, guys. It’s the only way. I barely even wipe the dust off a piece of furniture before I slap on the Zinsser. I’ve used it over chips, stains, polyurethane, you name it, and it never disappoints. And thank God, because sanding furniture turns me in the Autumn Monster.
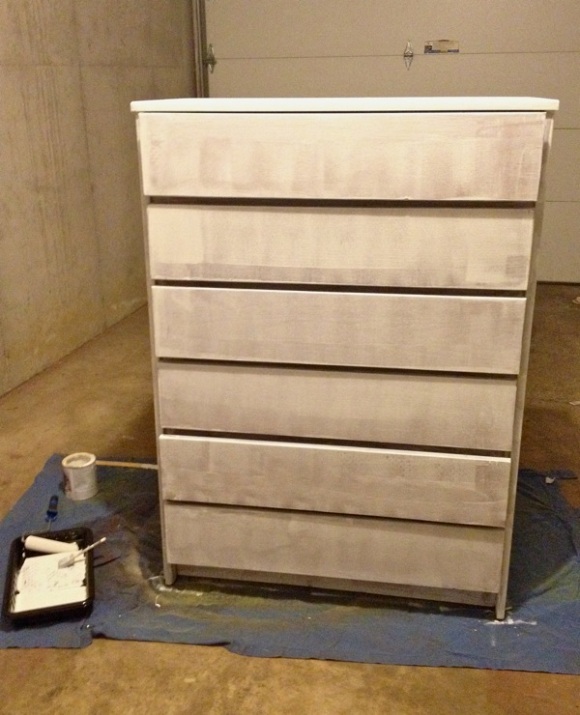
primed dresser

I know it looks like it doesn’t cover well, but it totally does. One coat is all it takes. And it dries in ONE HOUR omg.

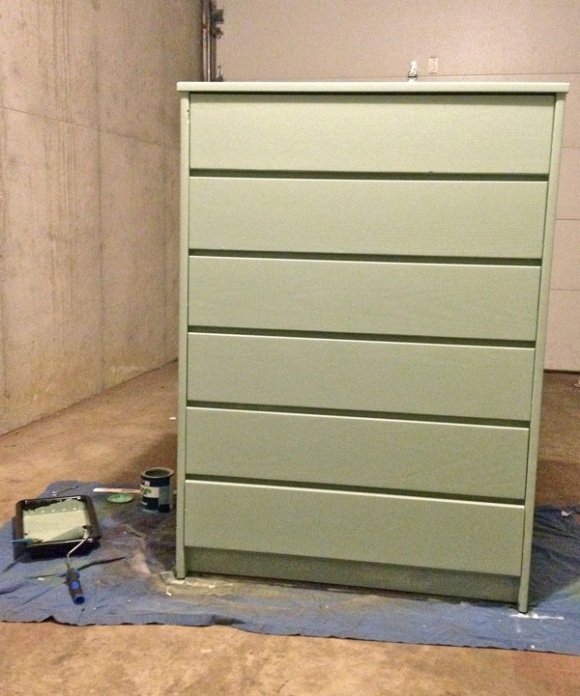
3. I painted her a fun color.

I found a quart of mis-mixed paint at my local hardware store that just happened to be in the family of colors I wanted. Naturally, if you buy discount paint you have to be a leetle flexible in terms of color schemes, so if you’re totally committed to that perfect shade, just pay the extra few bucks rather than drive around looking for unlikely deals. But this time I got lucky. What can I say—I saved a turtle on a bike path so I have awesome karma right now.

painted dresser

Didn’t the color turn out beautifully? I’m loving this seafoamy green right now.

4. I put labels on her drawers.

Ok, this part has lots of steps. You know what that means. Prepare for…A LIST WITHIN IN A LIST:

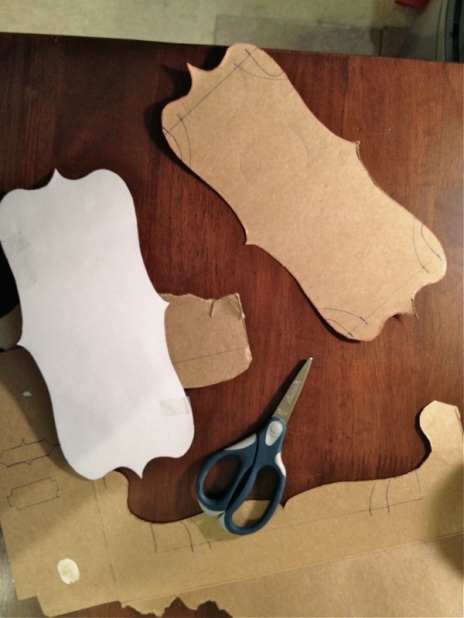
1. Find a free label shape online and print one you like. Then make a cardboard cutout and poke a hole in its center.

cutout

I used an empty beer case for my cutout. Reduce, reuse, recycle! Also, drink a lot!

2. Measure each drawer and mark the center (a level is the best tool for the job).
3. Place the cutout’s center hole over your center mark on the drawer. Make sure it’s straight, fasten it to the drawer with masking tape, and trace with a pencil. Repeat as necessary.
4. Paint the outline of your label (I used a can of leftover spray paint for a nice glossy yet translucent effect—just spray the paint in a cup and dip a brush in).
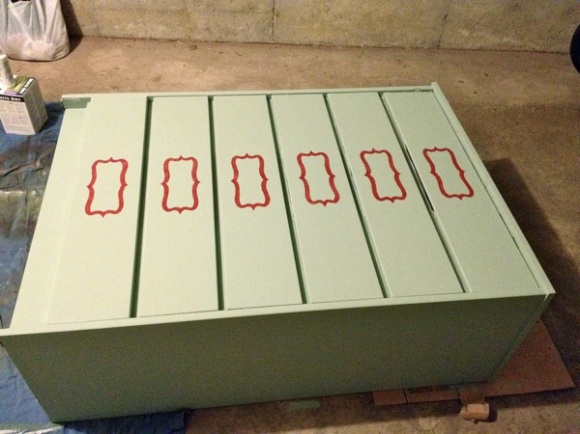
label outlines

My original idea was to outline the label shape with thumbtacks, but I am loving the red paint so much more. Serendipity, y’all.

5. Use this recipe to mix up some DIY chalkboard paint and fill in your labels. (Tip: Don’t be lazy like me. Actually sand and condition like Martha says. Otherwise your labels won’t be very smooth.)
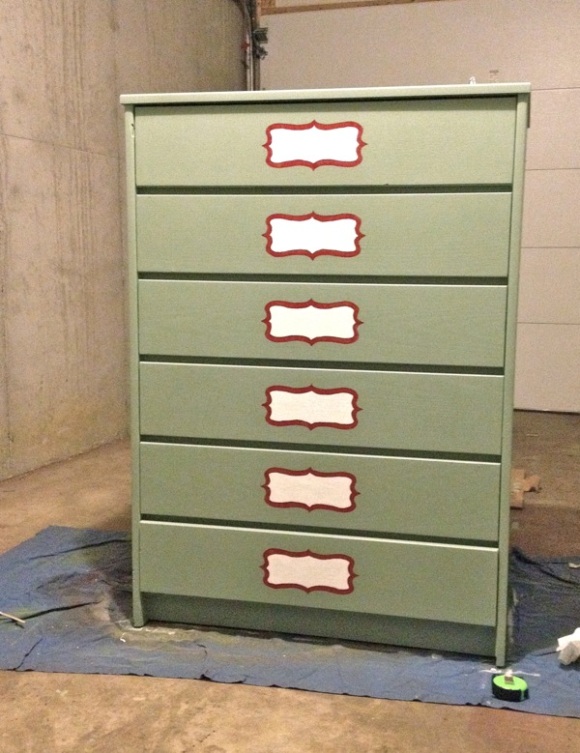
finished labels

I needed two coats for good coverage. Also, be warned that the chalkboard paint is thickish, so use a good sturdy craft brush.

5. I filled her with crafty things.

This poor dresser. I can only imagine the horrors of her past (moldy food, wadded up clothes, bugs and rodents, bad music, roommate fights, awkward sexual encounters—ah, college!). But now she has a new life holding my pretty yarns and threads and fabrics in a highly organized fashion—clearly what all dressers aspire to. So tune in text time for “Reasons Why I Insist Upon Treating Items of Furniture Like Sentient Beings.”
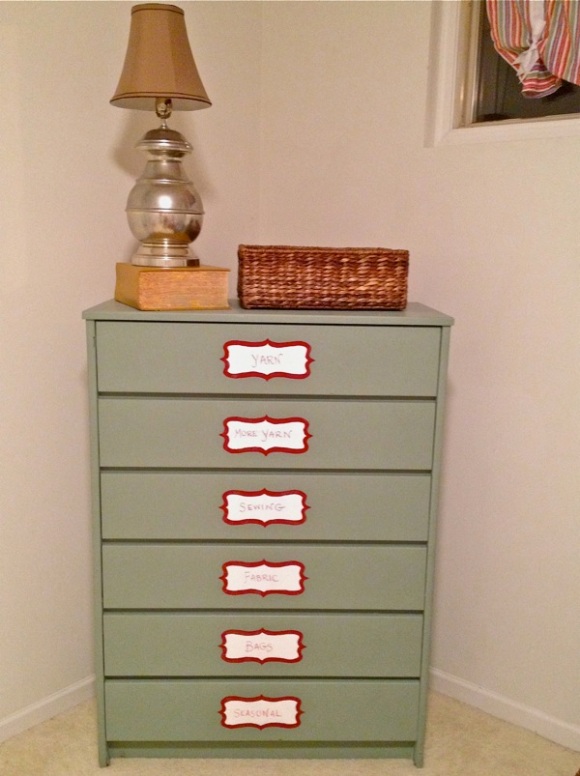
finished dresser

I know that lampshade is too small for that lamp but I’m liking the color and I’m too cheap to buy a new one. Also, see how my chalk didn’t go on terribly smoothly? Heed my warning! Sand! Condition!
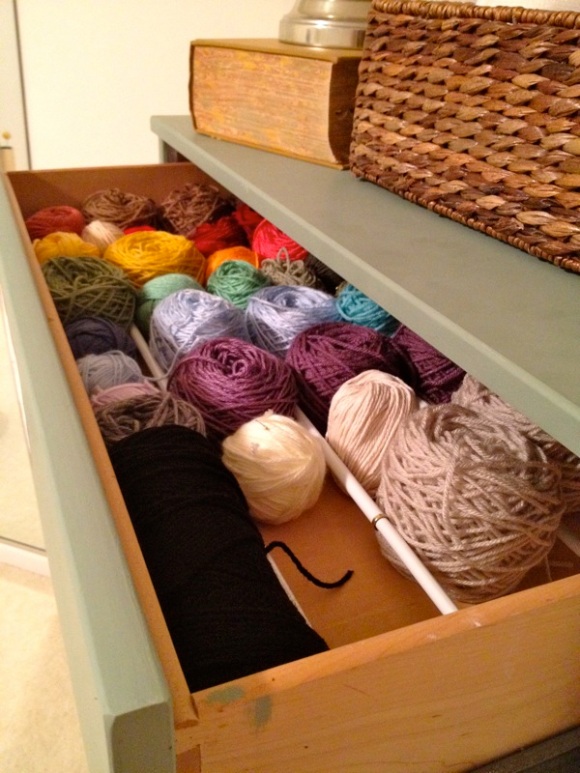
yarn

There’s another drawer of yarn under this one, but I figure the average blog reader can only take so much.
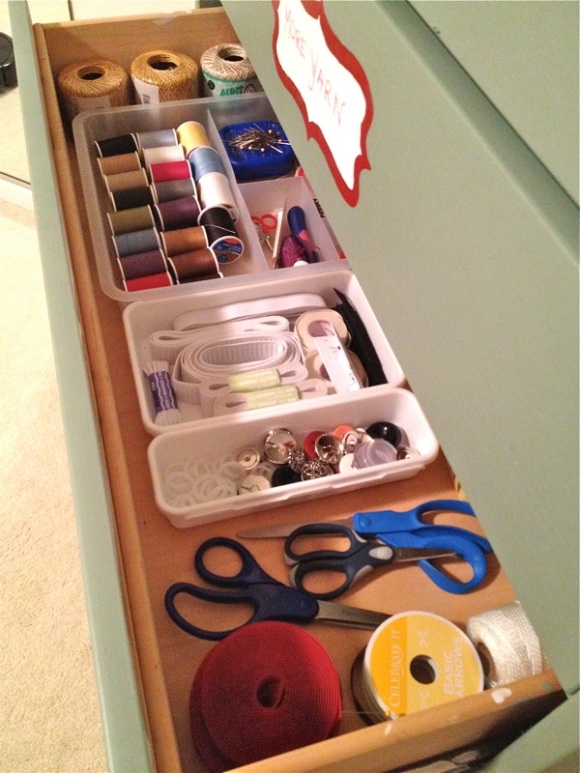
sewing stuff

Silverware trays and other drawer organizers from the kitchen aisle are handy for all this little stuff. I love Target’s selection!
Tagged , , , , , ,

4 Reasons Why I’m a Jedi Master*

Or, 4 Reasons Why My Life Is Slightly Less Higgledy-Piggledy Than It Might Be Otherwise

1. I made my own bike bag.

So all the bags out there for bike racks are either 1) panniers, which I don’t want because that’s just inviting a lot of weird balance issues, or 2) fugly. Come on. Why is everything black and utilitarian? Fashiony ladies, help me out here. Start designing some cute bags for the back of my cute bike. In the meantime, I had to make do with my own modifications to this tote bag, which is the perfect size and shape for the back of my bike. It’s insulated like a cooler, it’s nice and tall with lots of outside pockets, AND it has a crossbody strap. I can toss all my Autumnalia in there and just take the whole bag with me once I arrive at my destination. All I did was sew a couple Velcro straps to each corner and it works like a dream. Is the stitching neat and even? No. Did I separate my fingernails from the nail beds trying to push a needle through that tough fabric before I was smart enough to use a thimble? Yes. But, you know, it works. That’s the important thing.

Kindle, phone, keys, bike lock, change of clothes…everything fits.

2. I recovered the cats’ old scratching post.

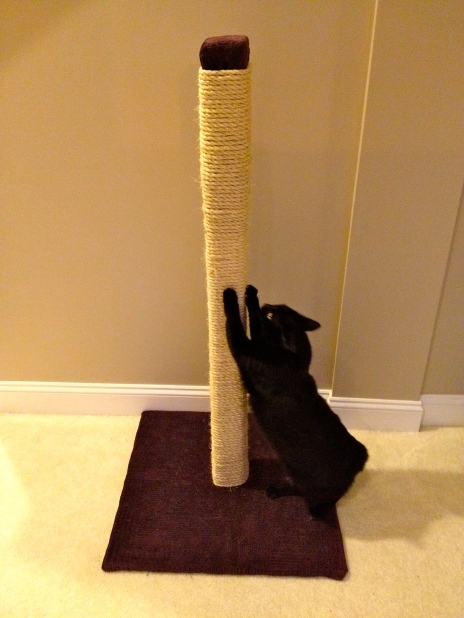
Dear Piglet, Monkey, Turkey, and Cricket: Your beloved scratching post has been restored to you. Please stop shredding the armchair. Please. With tears in my eyes, y’all. Seriously. Love, Autumn.

scratching post

Piglet enjoys the new post (after spending three hours attacking the sisal rope I was trying to wrap it with and making the whole process hideously difficult).

Anyway, I originally made this post a few years ago. The design is pretty simple if you want to do one yourself. The cats wear out the covering after about 18 months and then it needs to be sort of rehabbed, so this is the third time I’ve done this. But the structure itself is still going strong! Here’s some basic instructions if you want to build your own:

Make sure to wear gloves—sisal is ROUGH on the hands.

3. I embroidered this.

If you’re a cataloger, you’ve probably heard this slogan before. I find it’s a helpful reminder not only for the finicky work of cataloging (which requires that you interpret half a dozen complicated standards and formats with incredibly lengthy documentation), but also just for life. Stop freaking out so much over all the tiny details, guys. Be more like me. Be zen.

Sadly, I did not follow this advice when I took three dozen photos trying to get the best angle.

4. I cleaned out the car.

I don’t really have a picture of this or anything. I just felt like you needed to know.

*When I say “Jedi Master” I really mean “DIY goddess.” Same diff.

Tagged , , , , , , ,

8 Reasons Why I Was a Productivity Goddess This Past Week

Or, 8 Reasons Why I Now Feel Self-Righteously Entitled to Laze About in a Peignoir and Eat Bon-Bons 

1. I updated the built-in bookcase.

Goodbye hideous, ill-advised orange (seriously, people who lived here before, what were you smoking?), hello elegant plum fabric which I bought for $6 from an antique/junk mall and hot-glued to the wall.

Before

After

After after

2. I unpacked the rest of our stuff.

I’d been avoiding a last giant pile of boxes in our downstairs bedroom—mostly miscellaneous kitchen, garage, and office things. In fact, the place resembled one of those lockers they auction off on Storage Wars (new favorite show!). Anyway, I unpacked everything and got all the boxes flattened and stored and all the furniture set up. The room finally looks like a room. ::OCDsighofrelief::

In my last place all this stuff went in an office closet, but now it has to sit out in the open on shelves. I am ruminating on a plan to create a lot of storage by refinishing some old dorm dressers from the university’s salvage store, but that’s another story for another day.

Come stay at the Faulkner Hotel. Comfy futons and free gym access available. Piglet (lurking by the scratching pole) might walk on your face in the middle of the night, but no biggie.

3. I organized the garage closet.

Oh, couponing stash, how I’ve missed gazing on your orderly beauty. Also, my tools and hardware and paint supplies are all much more neatly put away now that I have all this extra space in the garage. It makes me want to, like, build a million things. Right now.

This is our first garage ever. I’m thinking it means I can finally get a table saw!

4. I re-organized the cat closet.

When we first moved in I threw the cat box down here and that was about it. Now I’ve set up a feeding station and a litter area way at the back (these are weighty issues if you have four cats) plus some extra storage. Husband thinks it’s dreary, but I think it’s quite cosy, and honestly, it’s not as if cats really give a crap about where they…well, you know, crap.

Harry Potter wishes his cupboard under the stairs was as roomy and well-arranged as this cat dungeon. Erm, closet.

5. I made this lamp.

I can just hear you. You’re all, “WHAT?! She made that?” I know. I bought this vase from an antique store for I think $8, can’t remember. Throw in a special glass drill bit ($12), a bottle-adapter lamp kit ($10), and a harp ($4), and voila! Easy-peasy one-of-a-kind super chic lamp for $34. Well, it was mostly easy—it did take FOR-GAWDHELPUS-EVER to drill that hole in the vase. I spent probably 30 minutes holding the drill to the spot. It’s a wonder my teeth didn’t shake out.

My antique store find

A 3/8 glass and tile drill bit made a perfectly sized hole.

I feel like Pygmalion right now.

6. I set up a new trash/recycling system.

Tyler and I found out that Lansing offers a really great, totally free, no-sorting-necessary recycling program, so I wanted to get jiggy with it, as it were. Problem: I didn’t want two trash cans in the already small high-traffic area where the original can lived. Solution: I had to shift around a lot of stuff in the kitchen, but I managed to clear out the one cabinet we have with a slide-out drawer. I put two smaller trash cans in there and now the kitchen is less crowded, plus I feel like I’ve practically saved the planet.

I had to take this picture five times because Cricket kept climbing in and out. Cabinets are like crack to her.

7. I put up some holiday decor.

Easter approacheth! I wanted some Easter cheer for my mantle so I painted these cute little eggsters with help from the husband. Do you see the one that says “EGG” on it? Yeah. That’s one of his.

My color palette was fairly limited due to some of my acrylic paints having turned into disgusting sludge.

This vase is another antique store find.

8. Then…I blogged about it.

Seriously, I am ON FIRE.

Tagged , , , , ,